Zendesk Salesforce Integration
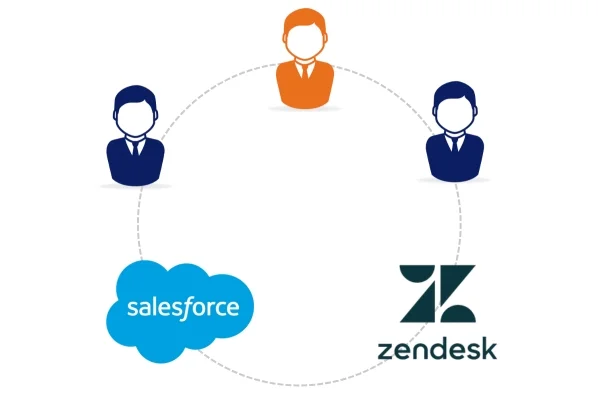
Zendesk vs Salesforce works on the principle of building the connection between both the account so that the tickets which are present inside the former platform can easily be viewed within the Salesforce accounts of the Salesforce org.
The ability of the Salesforce Zendesk Integration is often associated with the management of the opportunity pages and the accounts

within the sales force for approving the display of the Zendesk tickets. Zendesk and Salesforce are responsible for the management and the creation of the Zendesk tickets which can be further synchronized within the Salesforce account for the organization of the data inside the Zendesk Gateway.
Salesforce with Zendesk Integration: With Zendesk, you can give your sales and support teams a holistic view of your customers with a dynamic two-way data sharing integration between Zendesk and Salesforce. Zendesk vs Salesforcen services that helps you in having complete control for the level of information that is available for Zendesk agents from the platform of Salesforce. It also provides the best in class custom object like Zendesk Ticket by making use of the Salesforce target and also sending the entire tickets procedure inside the Salesforce.
Zendesk is also the best customer facing web interface that makes it flexible to have open API enabling integration factor for your organization. It provides feature-rich CRM tool that has multi-channel support characteristics that involve: social media, email, phone, chat, etc. It also includes streamlined reporting and analytics feature for your business.
Read more about Salesforce Consulting Services and Salesforce Integrations services at Techila .
GET IN TOUCH
Request A Free Consultation / Need Any Help For Business & Consulting
OVERVIEW
Overview Of The Integration
As you can see that there are the majority of the benefits are conveyed when both of these gateways get integrated and give out the new version for improving the functionality and efficiency of the original processes, Zendesk vs Salesforce.
While talking about the Salesforce Zendesk integration you often come across several procedures that are related to the limitations and advantages of the integration methods which gives us a superficial idea about the working and the mechanism.
Zendesk integration with Salesforce is only available whenever you can witness the usage of the Salesforce edition in the form of developer edition, performance, enterprise, and Limited which are some of the professional additions used with the management of API.

There are the majority of the Salesforce administrator roles and administrators those who are engaged for extending the Zendesk support have the capability of setting up integration and other procedures that may affect the process for performing some of the series of task. They are predominant series of tasks that are associated with a Salesforce Zendesk integration.
First of all, we will be covering the checking the setting associated with the Salesforce session and finally will go towards building the connection between the sales force and Zendesk gateway. In this digital module, we will also be dealing with the setting of the user access of Zendesk tickets within the Salesforce account.
IMPLEMENTATION
Checking Of The Process Of Implementing The Salesforce Session Settings
Some steps need to be considered for checking out the session of the Salesforce Zendesk integration settings where we can build the integration that needs some of the required specifications which can’t be set to the concerned locked IP address. First of all, you need to check that the session is going smoothly and If in case it is not seamless and you are facing the difficulties associated with the settings that gets locked, you are required to move towards disabling the Salesforce session settings that have been locked to the IP address and are also responsible for disconnecting the integration after the session gets expired.
Session steps
1. The very first step is to log in to the Salesforce account where you have to check in the Salesforce session settings and finally moved towards clicking on the cog which is provided in the upper right pane.
2. The next process is about clicking the setup button where we will get navigated towards the left navigation tab which is provided under the menu of settings and finally, we will get directed towards the security options. Once you have completed all these processes, you need to choose the session settings so that you can disable the Salesforce Zendesk integration sessions which have been locked and review for ensuring that all the Locked sessions to the IP address are getting enabled and originated.
After all, the session settings you need to make sure that the lock sessions are getting originated from the particular checkbox which needs not to be selected are instead of that you need to select the other option which is named as the lock sessions to the domain in which they were first used.

ZENDESK ACCOUNT
Building The Connection Between The Salesforce Account And The Zendesk
There are some steps that you need to follow for building such configuration between the two platforms and the admin Centre is the predominant location where you can go ahead for setting up the configuration and installation of another setup that also includes the location of the integration. The Salesforce administrator and the developers are always trying hard to set up a robust framework of the integration. The developers and the professionals put forth the recommendation that we should have a procedure of testing the integration in association with the Salesforce sandbox account and Salesforce Zendesk Integration sandbox account as one of the priorities. For building the connection between both the platforms, there is a need to follow the steps out of which the very first step is to navigate towards the predominant admin Centre where you have to click the integration icon which is provided in the sidebar located in the left direction.

After you have successfully landed on the next window after clicking the integration icon you have to click the button named connect which is provided beside the salesforce integration. Now the next step is to follow the selection of a Salesforce instance for setting up the integration between zendesk vs salesforce platform where you have to tick mark the Salesforce production in the checkbox that is provided under the tab of choosing the Salesforce integration and setting up integration according to the sandbox instance.

Installation
The next step is the installation of the managed package it will get opened within the Salesforce account as the new web browser tab and for that particular installation process provided within the package enables us to go to the lightning component in association with the visual force component for utilizing the ticket view feature. The package installation also lets us know about the components that are involved with both the platforms of Salesforce and Salesforce Zendesk Integration and there would be a prompt to login into the Salesforce account in case we are not logged in prior.
After you have successfully login to the Salesforce account you would be visualizing the separate private web browser window and come
across a single active Salesforce session. You can also see the window named install Salesforce integration for Zendesk where you select the install for all users and checkmark the acknowledgment for installation of the non-Salesforce application that is unauthorized concerning the distribution of the partner programs. The next step is to click the install button and after you have finished the process of installing the package you can click the button named as done and get the return to the admin Centre where you have to accept the built which is provided on behalf of the terms of use of zendesk vs salesforce. You can click connect and also select the allow access screen for allowing the settings and utilization of the configuration that is installed.
ZENDESK TICKETS
Setting Up The User Access Within The Salesforce Platform To The Zendesk Tickets
In this particular section, we will be dealing with the process of setting up the connection between both the platforms and you will also learn about the definition of the user profiles which are provided inside the Salesforce org so that we can easily visualize Zendesk tickets that are provided. For setting up the user access to the Zendesk tickets we need to select the concerned user-profiles and firstly there is a need to login to the Salesforce account where we can click the button named as cog provided in the upper right side on the upper right tab.
Now the next step is to go through the button named platform-tools which is provided in the left navigation sidebar. Then, you will be required to choose the manage connected application settings and go towards the Salesforce integration for the Zendesk application. After you have executed all the steps you need to choose the edit policies and then you will be directed towards the menu called – OAuth Policies. There we will be coming up across the menu named as permit users for approving the admin users to WhatsApp reauthorization of the procedures.
The next step is to click on the save button for visualising the required settings. Now there is a need to return to the page named as manage connected apps where we have to select the Salesforce integration for the Zendesk app. The screen also prompted us to go towards a profile and opt for the manage profiles so that we can easily choose the user profiles provided within the Salesforce account and accept the accessibility to the Zendesk tickets.
There is a need to choose the system administrator profile and also you need to make sure that whatever the number of user profiles you have not opted for will not get displayed for viewing the Zendesk tickets. The last step is to press the save button for setting up the accessibility between both platforms and giving a Zendesk ticket.
Takeaways
This is how we can work for the integration between both the platforms and activate some of the Salesforce settings while we are working on building the connection and configuration. There are certain procedures that guide is about with this connection between the integration methods during which you can easily retain the configuration settings in case you have a desire to set up them again in the future.
OUR PROCESS
We Provide Most Exclusive
Process For Business
Listen
We connect you with our experts who try to understand your business requirements and challenges that you are facing with your current implementation by asking relevant questions
Suggest
We provide the best solution to your complex business challenges by considering what is right for the business and its customers instead of what we think is right. This is a real definition of digital transformation for us.
Implement
We believe in working together rather than for anyone because we all know together we always achieve more. Hence we act as your partners who are responsible for making you and your business successful with the implementation.
Iterate
We strive for continuous improvement instead of perfection. Hence we listen to your feedback and according to that, we focus on making improvements continuously within each milestone, sprint, and release.

 +1 561 220 0044
 +61 255 646464
 +91 909 080
3080


